Chào các cô! Chào các bạn!
Chúng tôi đã có một nấu ăn project cho LAV1201 Việt Nam 1. Nhóm của chúng tôi có năm sinh viên, gồm có Minh, Trâm, Thu, Giang và Xuân.
Thứ sáu buổi tối last tuần, chúng tôu đã đi nhà Trâm để nấu Chả Giò (Vietnamese fried spring rolls).
Thu was placing the ingredients on “popiah” skin during our first cooking trial of Vietnamese fried spring rolls.
All the spring rolls were wrapped and they look delicious!
Frying of the ‘not so authentic’ Vietnamese spring rolls
Potential housewife--- Thu
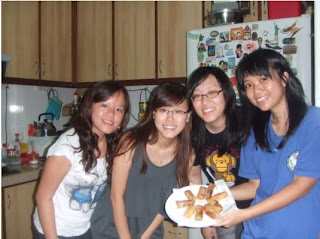
Our final product from the first trial! (:
A Group photo with our initial ‘not so authentic’ spring rolls =)
Nó đã thành công, nhưng chúng tôi đã worried about ngày mai vì chúng tôi chưa tried out nấu với Việt Nam rice paper. Sau khi nấu ăn chúng tôi ở lại để thảo luận về decorations for món ăn của chúng tôi. Chúng tôi cảm thấy rất vui mừng.
Chúng tôi đến nhà Thu vào sáng thứ bảy để chuẩn Nguyên liệu của chả giò. Nguyên liệu của chả giò là tôm, thịt lợn, nấm, cà rốt, và some other ingredients. Chúng tôi đã đồng ý mặc red clothes vì nó represents cho một Màu sắc của cờ của Việt Nam. Every one of us was self-initiated and eventually we were able to finish on time.
Things that are done before reaching ở nhà Thầy Minh:
1) Marinate the raw minced pork and unshelled minced prawns by adding some seasonings (Pepper, salt, soy sauce and sugar. Chicken seasoning is optional.) As for the exact amount, it’s really based on intuition.=p
2) Stir fry the shallots and garlic over a small fire. Thereafter, add in the carrot strips, yam strips, spring onions, black fungus strips and stir fry them swiftly. Scoop the veggies out into a container.
3) Stir fry the minced pork and prawn over a short period of time, ensuring that it is not FULLY cooked. Put them in a separate container.
Sau đó,chúng tôi đến nhà Thầy Minh. Although we were one of the last few groups to arrive, our ingredients and decorations were already prepared. Hence, we managed to learn the wrapping skills from cô quỳnh and started the frying process swiftly. However, the deep frying process took the longest time as the oil needs to be fully heated up before putting in the spring rolls. The frying process is tedious but nevertheless crucial to produce a good and crispy spring roll! (: The following steps are what we have done at Thầy Minh house.
4) Mix the veggies and meat together evenly before cracking two eggs in. Mix thoroughly again.
5) Handle the rice paper with caution. They are VERY delicate in the presence of WATER. Instead of dipping the rice paper into water, we spread water on it evenly to gain better control.
6) After which, we can begin with the wrapping of spring rolls! Caution! Putting too much fillings may tear your paper while rolling. However, putting in too little fillings will make the rolls less tasty and appear empty when eating.
7) The art of rolling: it is similar to how hawkers wrap POPIAH. Fold in the two sides of the paper first and then start ROLLING slowly. We must ensure that the spring roll is packed tightly. (This means that your fillings should not be too little) If the rice paper won’t stick at the end, just add a little bit of water to seal the roll up.
This is the potential housewife! Thu rolling away... ...
The authentic end product of the spring rolls before they enter the oil should look something like this (:
8) Frying: Heat the oil till bubbling occurs continuously to ensure that oil is ready. You need loads of patience for this! (: Introduce the rolls in batches to allow us to monitor the progress of the frying closely without any confusion. Deep fry the spring rolls until they turn golden brown.
Looks YUMMY right? :D
9) The sauce: While some are frying the spring rolls and decorating the plates, a representative is sent out to learn how to make the sauce from Cô Bích.
The raw sauce - without chilli and garlic.
10) Remember to add garlic and chilli to enhance the taste. Các cô thích! Too much chilli may not be favorable too.
11) After the spring rolls are done, drain them thoroughly to help reduce the consumption of unhealthy oil! (:
The best way is to tap the spring rolls with kitchen towels as they absorb oil effectively.
12) We then place the spring rolls on the decorated plate and our dish is ready to be served on the dining table!
Our rất đẹp chả gió! ^^
During the tasting, we were anxious of how our finished product tasted. But it turned out fine surprisingly and we were very relieved. This learning process was a very fruitful one and everyone enjoyed this unique cooking experience! GoGo Team Frog! =))
Thế thì tốt quá!
***For the filling of the (Chả Giò), we followed our LAV senior’s recipe as we felt that the ones online were not as reliable as a group which experimented it before. After browsing, we decided on the recipe from this link:
http://lavatnus.blogspot.com/search?updated-min=2009-01-01T00%3A00%3A00-08%3A00&updated-max=2010-01-01T00%3A00%3A00-08%3A00&max-results=25


.bmp)


No comments:
Post a Comment